Generate a .pem file
This article provides steps on how to generate a .pem file that we need to send notifications to your app's users. The .pem file is a prerequisite if you want to use Blueshift to send notifications to your users.
A remote server can't directly push a notification to a user's device. If you want to send notifications to the user of your app from a remote server, Apple wants you to create a notification payload and send it to the Apple Push Notification service (APNs), and then APNs sends the notification to the targeted device.
Now, to send the notification payload to APNs, you have to generate a .pem file for your app. A .pem file contains the certificate and private key that the server must use to securely send the notification payload to the Apple Push Notification service (APNs). APNs uses the certificate in the .pem file to validate if the push notification request comes from a server that is authorized to do so. If APNs validates that the server is using the right certificate, it takes the notification payload from the server and pushes the notification to the user.
So, if you want to let us send notifications to your users, we need you to generate the .pem file and upload it to our platform. We can use this file to securely create and send notifications to a user of your app. The following steps describe how-to generate a .pem file and upload it to our platform.
Create a certificate signing request
A trusted authority must issue a signed certificate that we will use to securely send the notification payload from our platform to APNs. To get a signed certificate, you have to create a request for it on your Mac. After you create a request, you have to upload it to the Apple Developer Portal. We'll get to that once you perform the following steps to create the request on your Mac:
- On your Mac, launch Keychain Access.
- On the Apple menu, click Keychain Access > Certificate Assistant > Request a Certificate From a Certificate Authority....
- In the Certificate Information dialog, provide the email address and the name that you use to build your apps, select Saved to disk in the Request is: field, and click Continue.
- Provide a name for the certificate and save it to a folder on your Mac. A
. certSigningRequestfile with the name you specify is saved to your Mac.
Create the certificate
Now that you have created a request to sign a certificate, you have to create a certificate and attach the signing request to it. This is the place where you upload the request file that you created in the last procedure. Perform the following steps to create the certificate:
- Launch and sign-in to the Apple Developer Portal on a browser.
- Navigate to the Certificates, Identifiers, & Profiles page. Ensure that iOS, tvOS, WatchOS is selected in the upper-left corner.
- In the left pane, click All under Certificates.
- Click the + button on the upper-right corner of the page, near the search button, to add a new certificate. This launches a wizard to create the certificate.
- In the Select Type section, either choose Apple Push Notification service SSL (Sandbox) under Development or choose Apple Push Notification service SSL (Sandbox & Production) under Production based on your requirement and click Continue.
- In the next section, select the app ID of the application that you have integrated with Blueshift and click Continue.
- Click Continue in the About Creating a Certificate Signing Request section. We have already described how to do this in the previous procedure. If you haven't done that, we recommend that you do it and then come back to this step.
- In the Generate your certificate section, upload the certificate signing request (
.certSigningRequest) file that you created in the last procedure and then click Continue. - In the Your certificate is ready section, click Download to save the certificate file to your Mac. The file that is saved is a
.cerfile. - Double-click the
.cerfile to add it to Keychain Access.
ImportantThe
.cercreated from the Apple developer portal must be installed on the same system where you created the Certificate Signing Request(CSR). Once you install the.cerit will pair with the private key you created using the CSR, and shows up in the KeyChain Access.
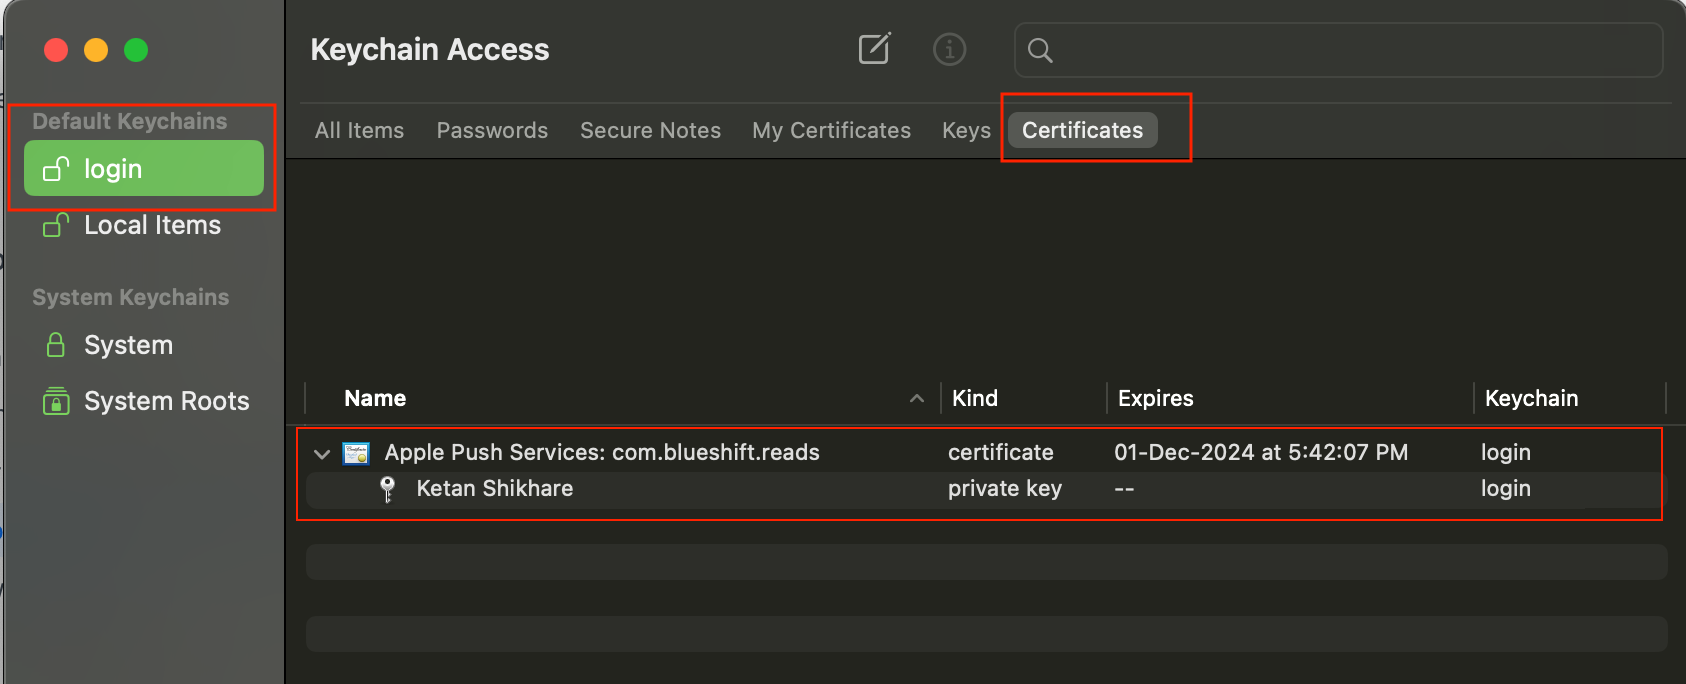
- Open Keychain Access on your Mac and click My certificates in the left-pane.
- On the right-pane, select the Apple push services certificate, you can identify it using the bundle id you used to create it. Do secondary-click (or right-click on it) and then select the Export... option.
Make sure you see the certificate and private key both as shown in the below image.
- When you select the Export... option, you get a dialog that prompts you to provide the file name and extension. Provide a filename, location, and the file format and click Save. Ensure that Personal Information Exchange (.p12) is selected in the File Format field.
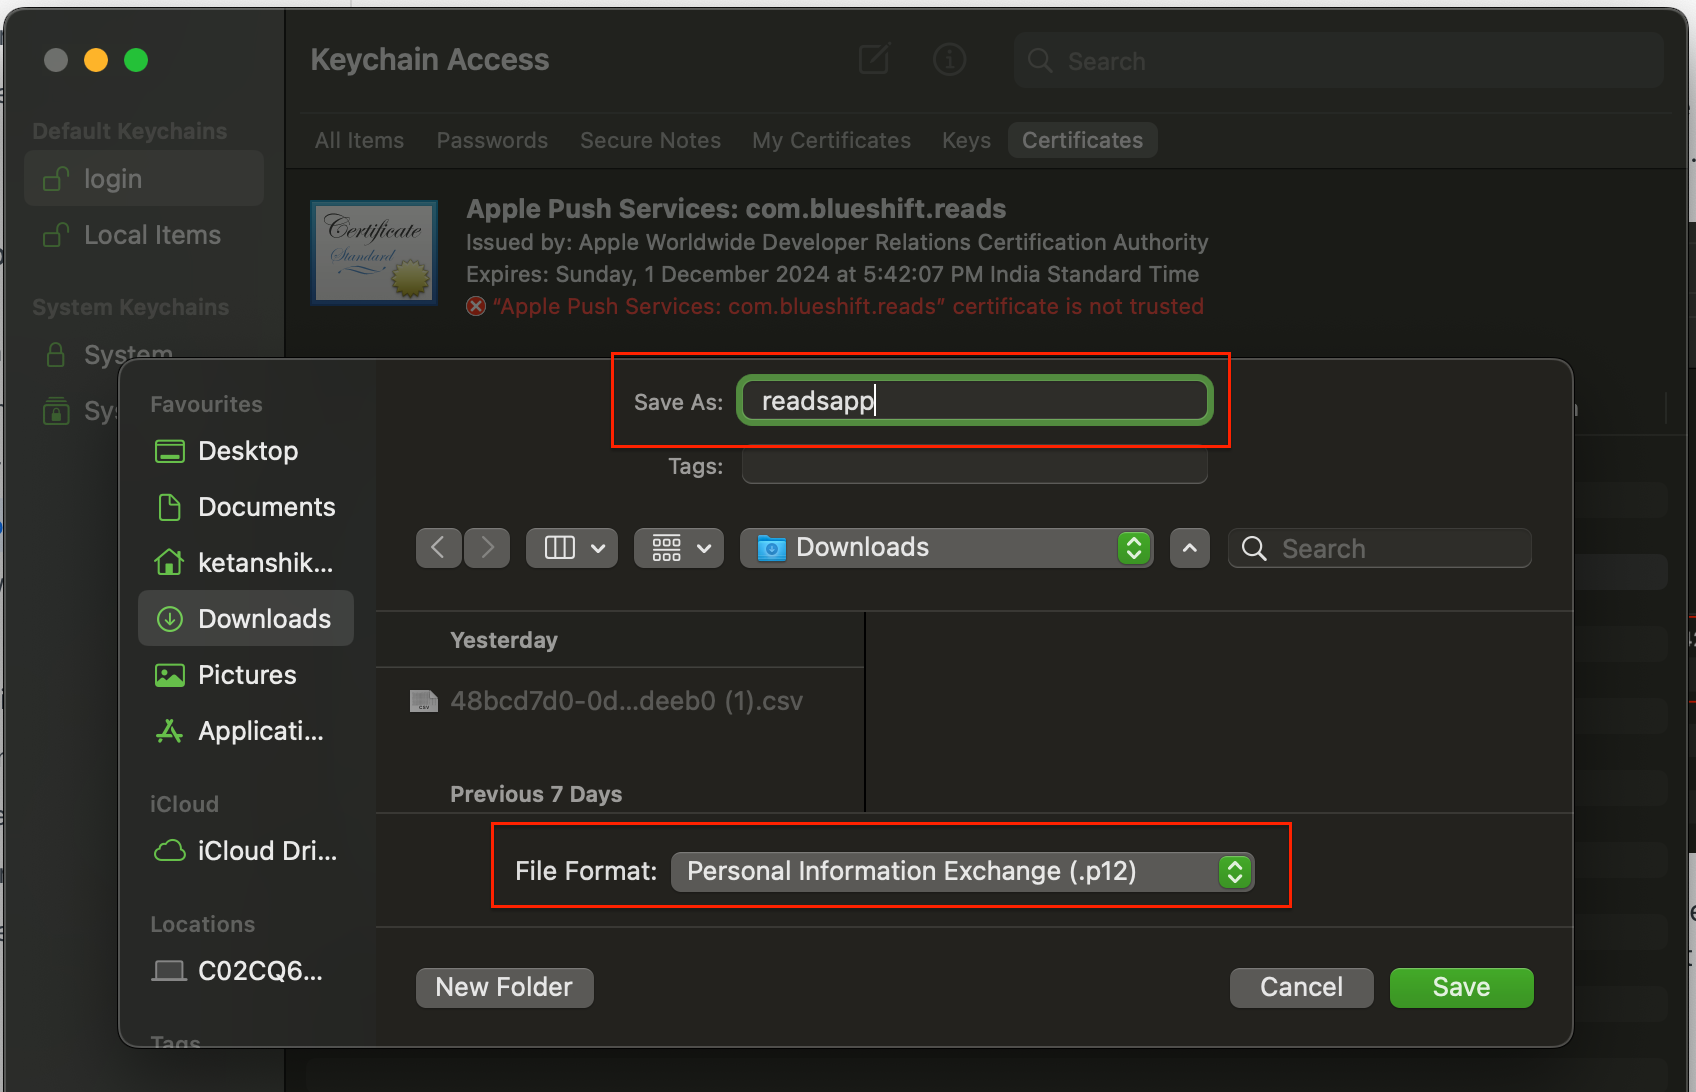
ImportantIf the private key is missing then the p12 option will be disabled and you won't be able to export the p12 file.
- You get an option to protect this file with a password.
- Click OK without filling-in the Password and Verify fields if you want to save the
.p12without a password. - Otherwise, you can provide a password and then click OK to create it with a password. In this case, note down or remember this password since you'll have to provide it later.
You just created the .p12 file. Now, we'll show you how you can generate a .pem file and upload it to our platform.
Generate the .pem file
Now that you have generated the signed certificate, you have to convert it to a .pem file. Perform the following steps to convert the .p12 file to a .pem file:
- Launch the terminal on your Mac.
- Change directory to the folder where you have saved the
.p12file. - Run the
openssl pkcs12command to generate a.pemfile using the.p12file.
For Mac OS Sonoma 14 and above -
openssl pkcs12 -in BlueShiftPush.p12 -out BlueShiftPush.pem -nodes -clcerts -legacyFor Mac OS Ventura 13 and below -
openssl pkcs12 -in BlueShiftPush.p12 -out BlueShiftPush.pem -nodes -clcertsIf you created the .p12 file with a password, provide it when the terminal prompts: Enter Import Password. If you did not create the .p12 file with a password, press the return key without entering anything.
PEM file requirementsIn the commands above,
BlueShiftPush.p12andBlueShiftPush.pemare example filenames. Replace them with your actual filenames.The
.pemfile must be a UTF-8-compatible plain text file that includes both the APNs certificate and private key PEM blocks. Do not upload a.p12,.cer, DER-encoded certificate, or a.pemfile with non-UTF-8 encoding — these will cause upload errors.If the
.pemfile has an encrypted private key, you will be prompted to enter the password when uploading. The password protects the private key only; the file itself remains a plain text PEM file.
Upload the .pem file to our platform
Now that you have generated the .pem file, upload it to our platform so that we can send notifications to your customers. If the .pem file has an encrypted private key, provide the password when uploading. For steps on how to upload the .pem file, see this section.
Updated about 1 month ago