Using Carthage
This article provides information on how to use Carthage to set up Blueshift's iOS SDK.
Using our iOS SDK is easy. Perform the following steps to set it up in your app's Xcode project using Carthage, so that you can integrate our platform with your app using Carthage.
NoteThis article provides information on how to set up our SDK in your iOS project using Carthage. If you want to use CocaPods instead, see Set up Blueshift's iOS SDK using CocoaPods.
1. Download Carthage
Carthage is a simple dependency manager that you can use to include our SDK into your Xcode project. Carthage is available as a brew package, and you can run the following command to download and install it on your Mac.
brew install carthage2. Create a Cartfile
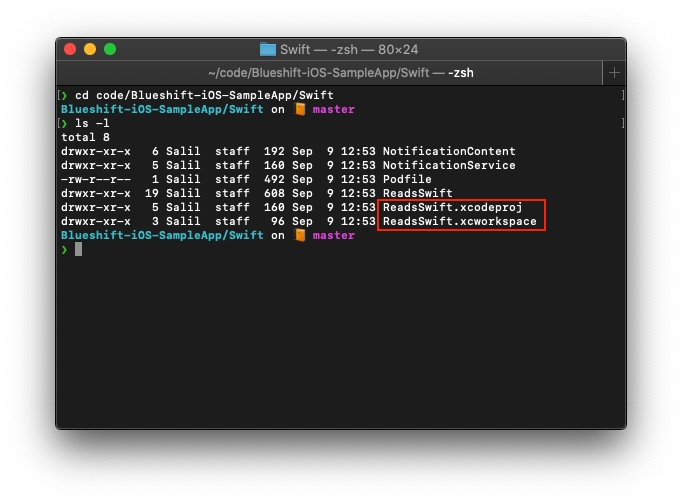
After the installation is complete, create a cartfile in the same directory where your .xcodeproj or .xcworkspace file is located. For example, if your Xcode project is created under code/Blueshift-iOS-SampleApp/Swift, then launch the terminal and change directory (cd) to this location. Once you are into your Xcode project's directory, you can see that the folder contains .xcodeproject or .xcworkspace file in it.

Here, run the following command to create the cartfile.
touch cartfileIn this file, add the following line to add Blueshift iOS SDK as a dependency in your Xcode project.
github "blueshift-labs/Blueshift-iOS-SDK"
After you perform these steps, run the following command on your terminal. Ensure that you are in the same directory on your terminal where the .xcodeproj or .xcworkspace file or both files are located.
carthage update --use-xcframeworks
This step creates a cartfile.resolved file and the Carthage directory in this location. You can look into the Carthage/Build folder to verify that Carthage has created the XCFrameworks.

3. Specify the iOS app's dependency on Blueshift's iOS SDK
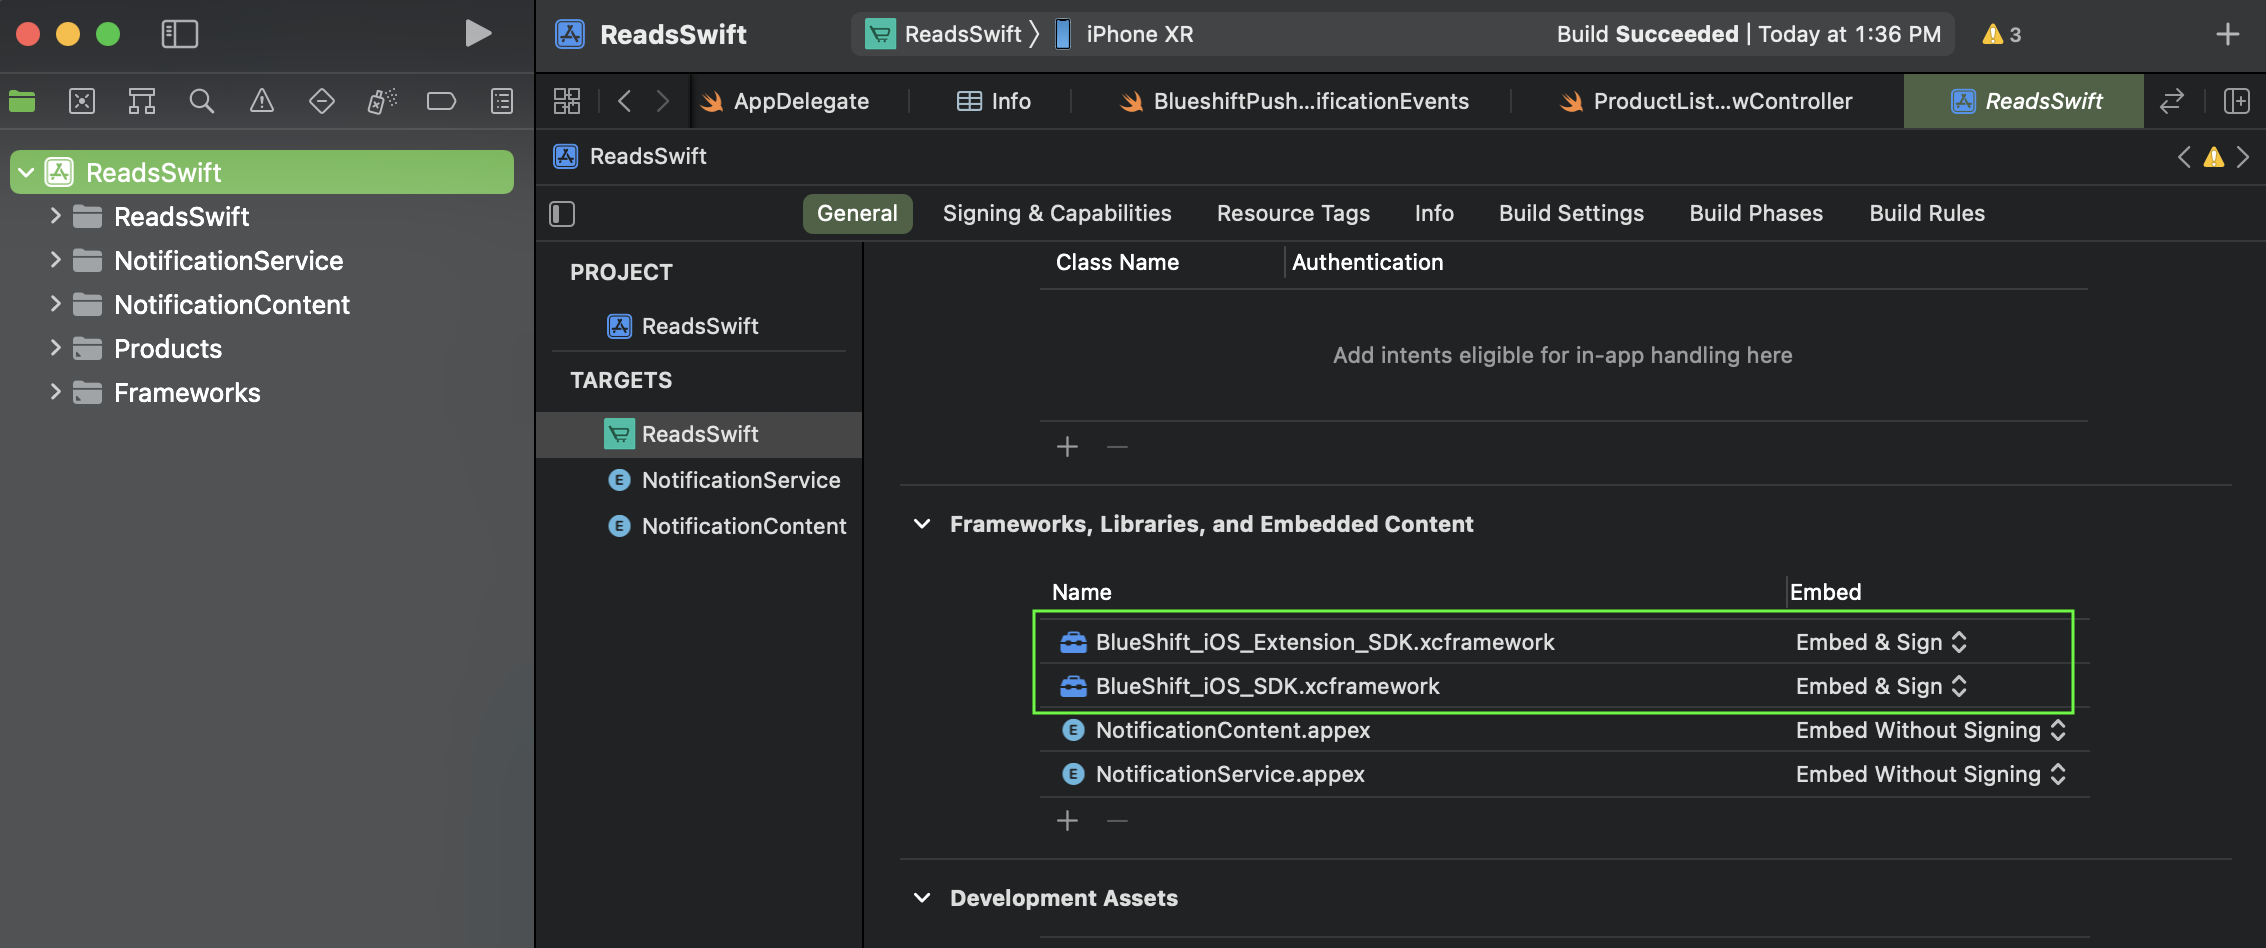
Now, launch Xcode and drag-drop BlueShift_iOS_SDK.xcframework and BlueShift_iOS_Extension_SDK.xcframework files from the Carthage/Build folder into Frameworks, Libraries, and Embedded Content section of the General settings of your app's target. Make sure these frameworks are embedded as Embed & Sign.
Integration of BlueShift_iOS_Extension_SDK.xcframework is optional and you can skip adding it if you don't want to use our rich push notifications capability. Otherwise, ensure that you add both the XCFrameworks.

4. Optional: Add support for Blueshift's rich push notifications
If you plan on using the rich push notifications with images/gifs capability, add a notification service extension target to your project. For more information, see Set up notification service extension.
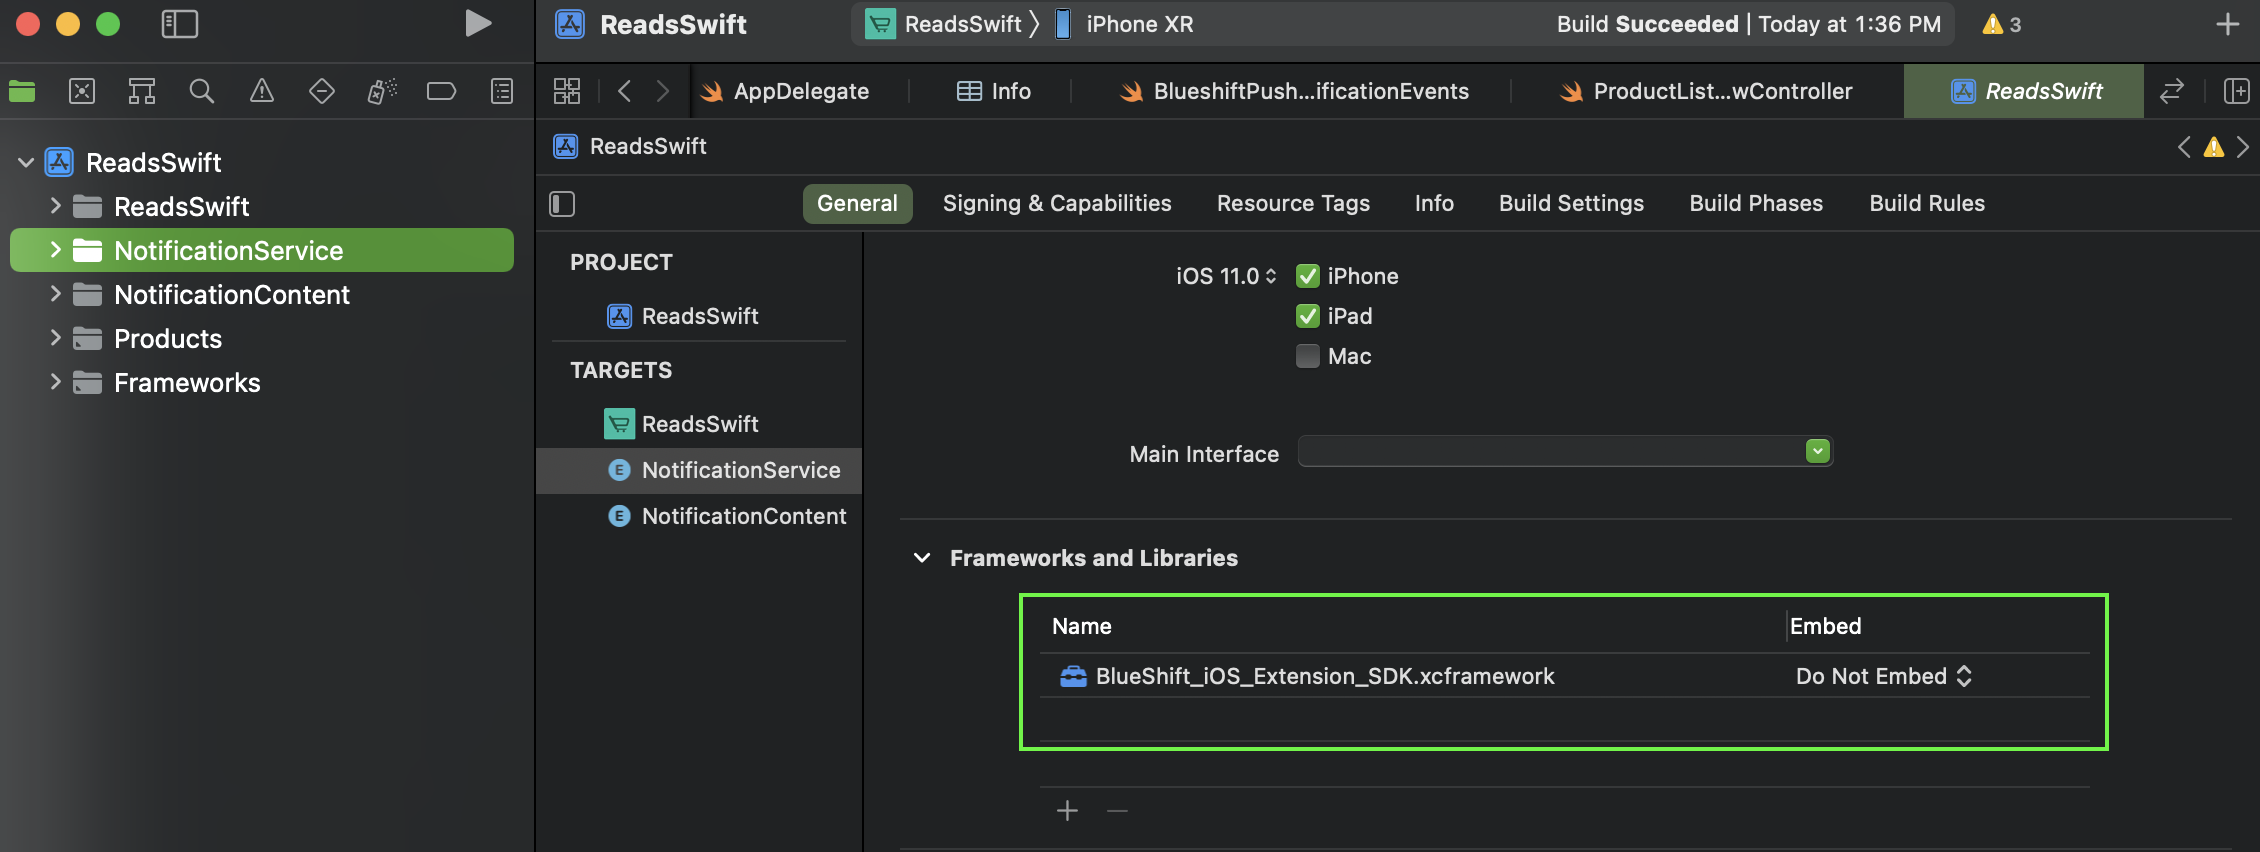
After you add the notification service extension target in your app, go to Frameworks, Libraries, and Embedded Content section of the General settings of notification service extension target and drag-drop the BlueShift_iOS_Extension_SDK.xcframework file. Make sure you embed it as Do Not Embed.

4. Optional: Add support for Blueshift's Carousel Push notifications
If you plan on using the rich push notifications with carousels capability, add a notification content extension target to your project. For more information, see Set up notification content extension.
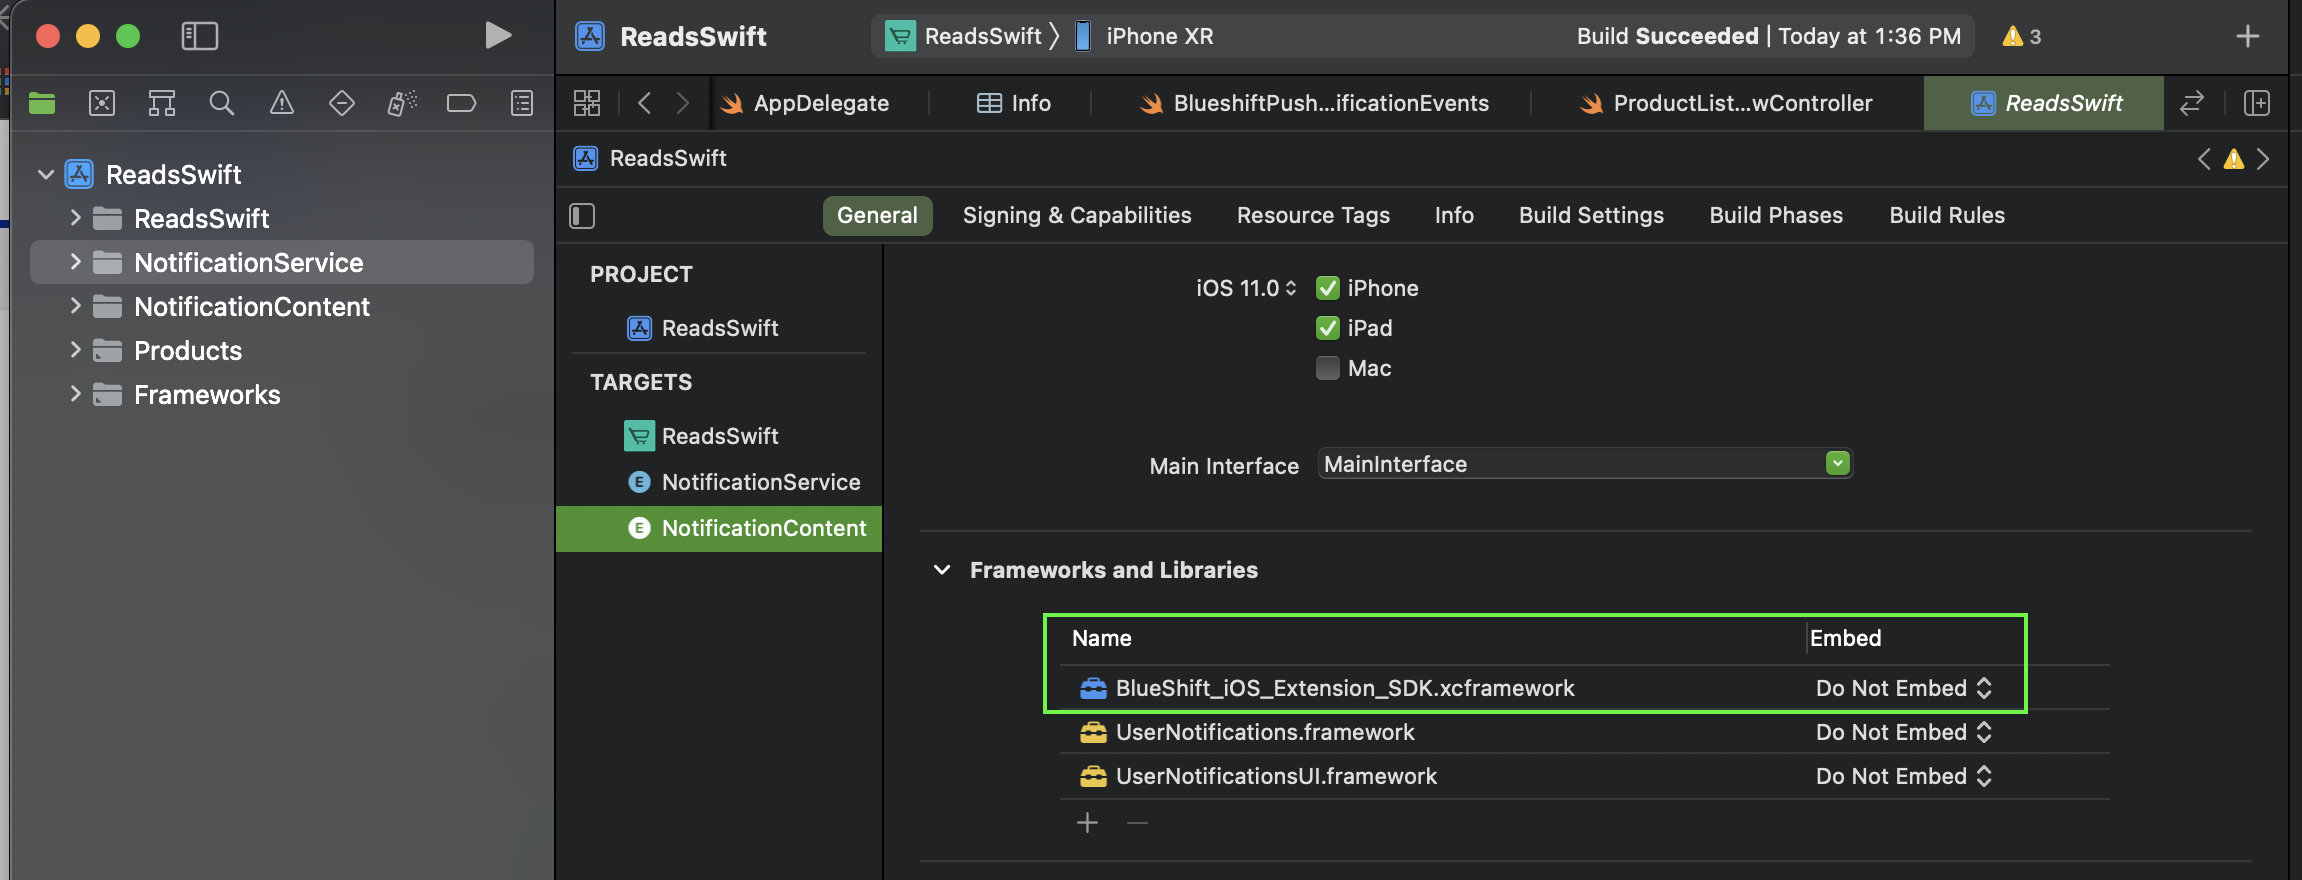
After you add the notification content extension target in your app, go to Frameworks, Libraries, and Embedded Content section of the General settings of notification content extension target and drag-drop the BlueShift_iOS_Extension_SDK.xcframework file. Make sure you embed it as Do Not Embed.

5. Register your app with Blueshift
Once you set up the SDK in your Xcode project, register your app as a channel in the Blueshift web app.
Summary
- The SDK is installed and is ready to configure
- The Push notification adapters are set for sending push notifications.
That’s it. You can proceed to the next steps.
Updated 5 months ago