
Register your iOS app with Blueshift
Provides information how to register your app with Blueshift so that you can run campaigns and send promotional messages to your customers who use your iOS app.
Ensure that your applications are registered with us as a channel on the Blueshift app. To set up a channel, complete the following steps:
- Sign in to the Blueshift app.
- Click Apps in the left navigation menu.
- Go to All Apps, search for, and select Blueshift Push. You can also go to Mobile Marketing Apps and select Blueshift Push.
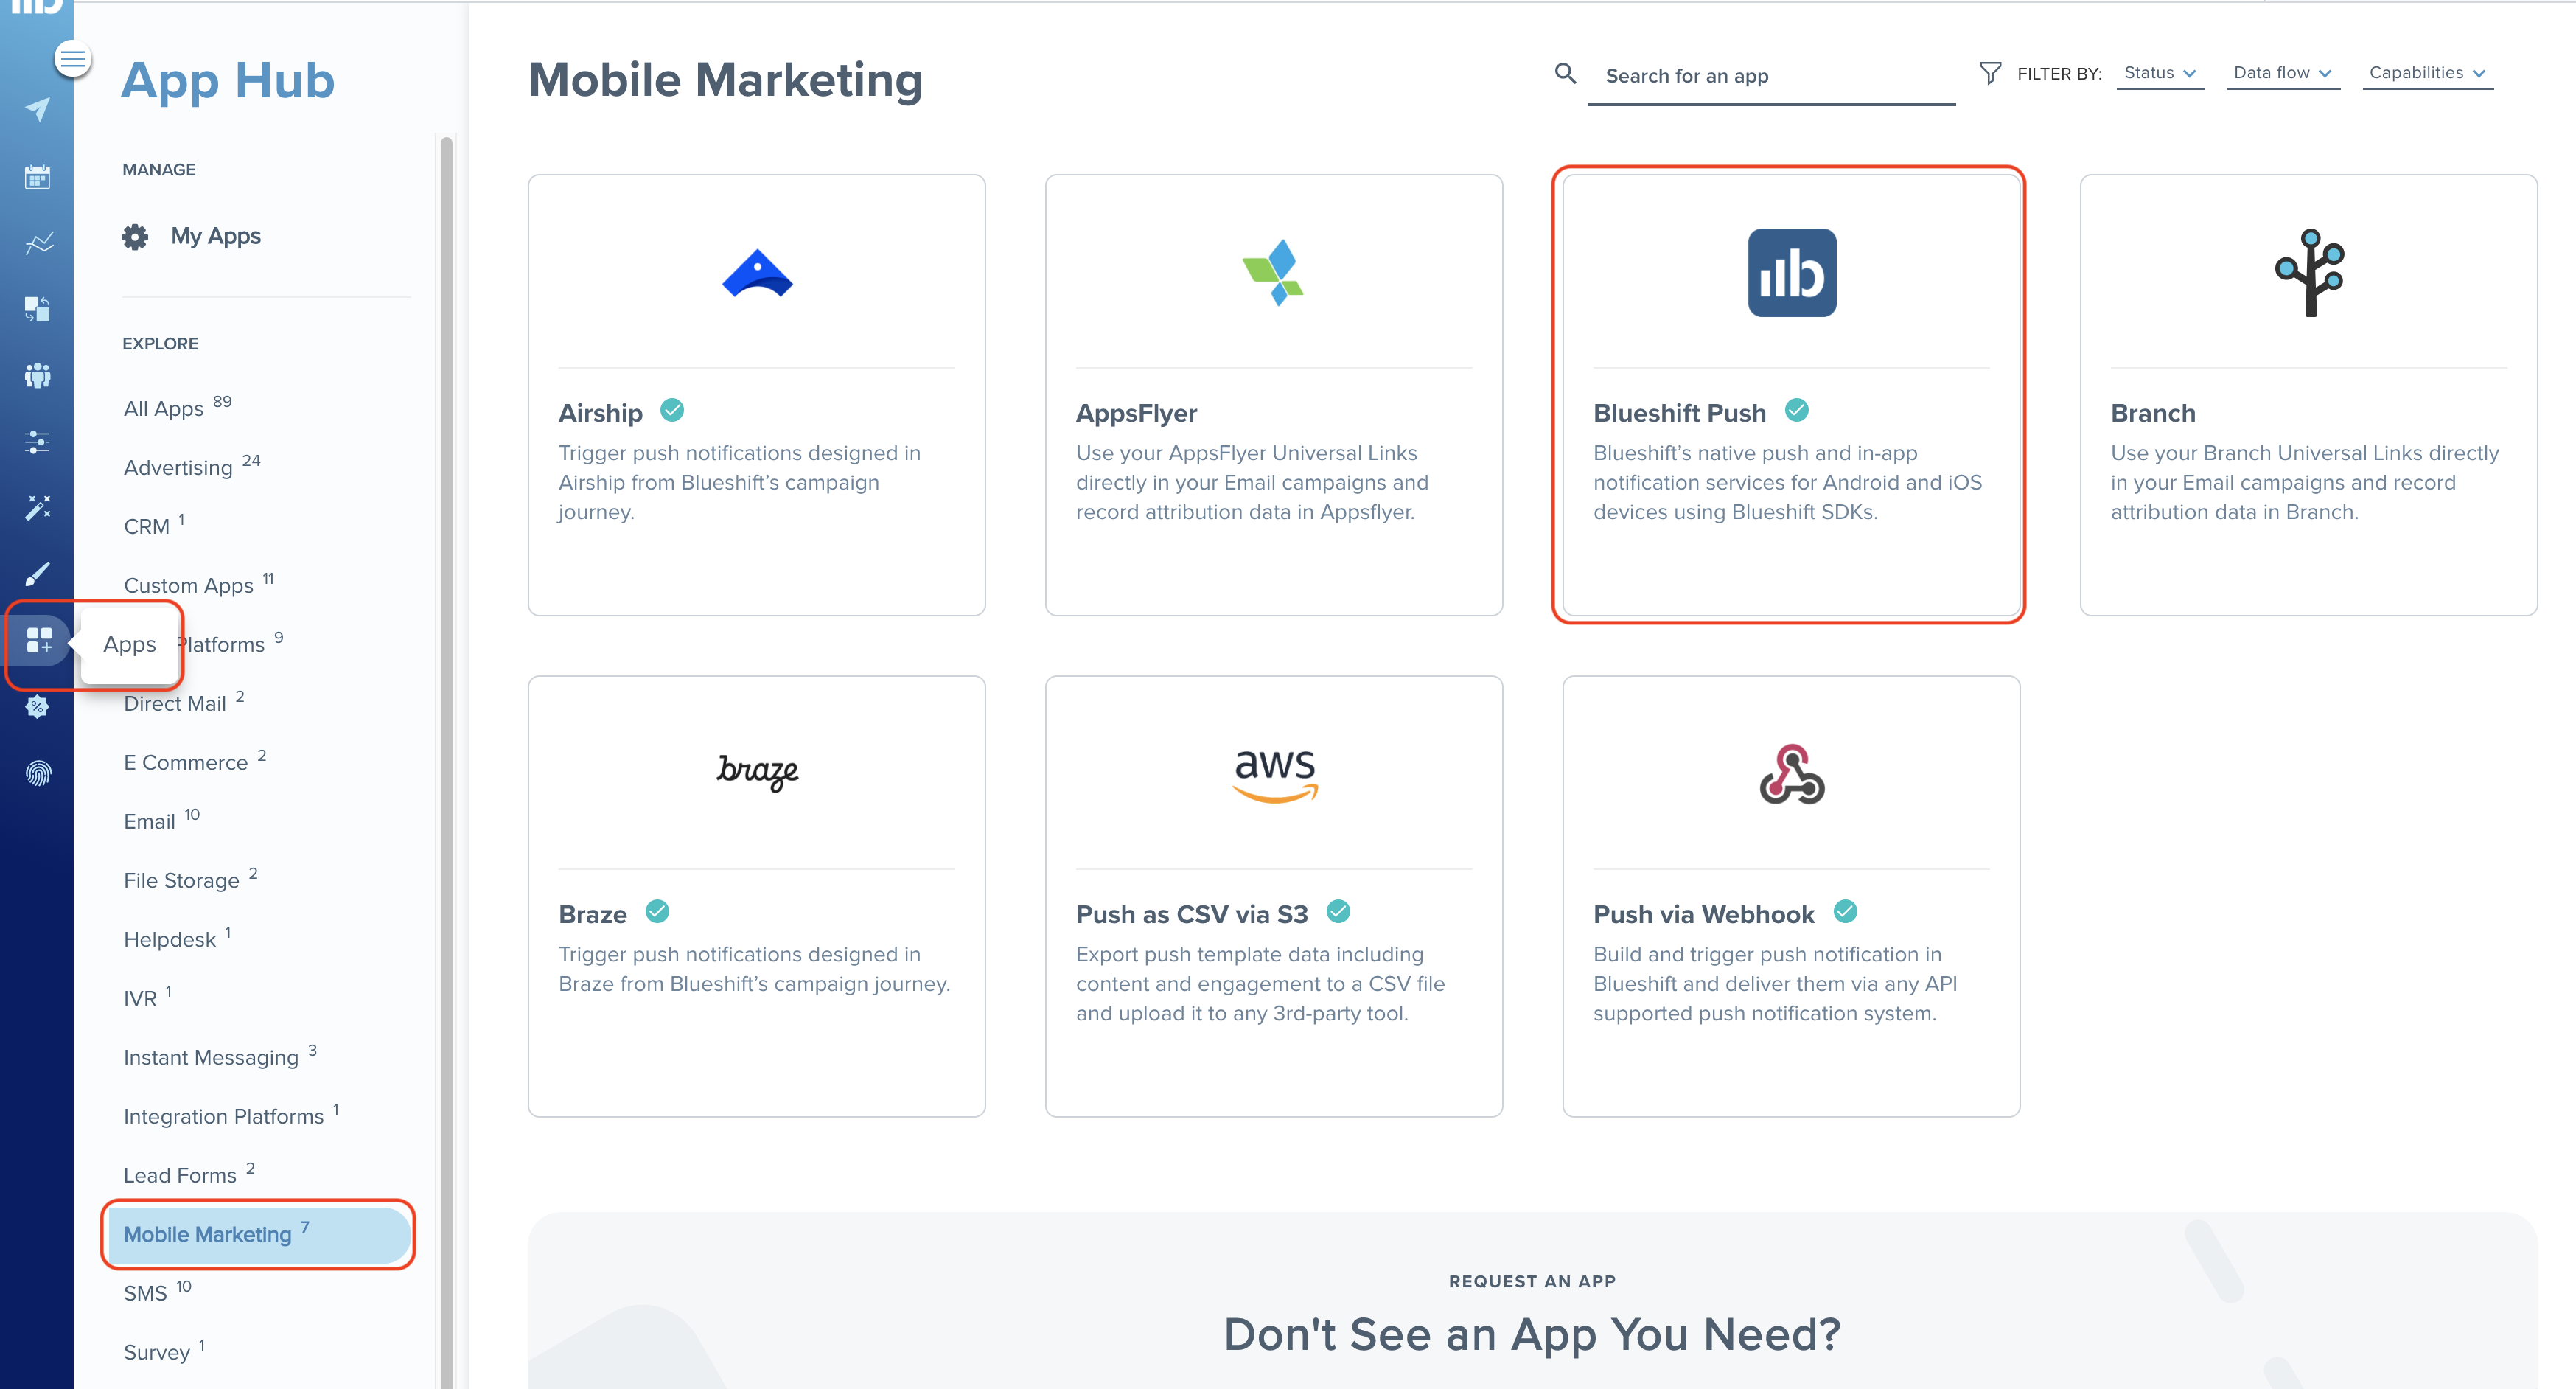
- Click Configure to view existing adapters and to add new adapters.
Based on your requirements, follow the steps under either the Single App account or the Multi App account.
Single-app account
These are accounts that allow you to add only one app per platform. You will be provided with one adapter to register both Android and iOS apps.
You will need the following information to register an iOS app.
- Application Name: Provide the name of the application that you have integrated with Blueshift. The name can be anything, but the Android and iOS app names need to be unique for that adapter.
- Bundle ID: Provide the application's bundle ID that uniquely identifies your app. For more information, see Bundle IDs.
- Environment: Choose Production or Sandbox based on your application build type. To know more about the Environment selection, refer to this section.
- Select Authentication Method: Choose Token-based authentication (recommended) or Certificate-based authentication.
Token-based authentication
- APNS Token: Upload the
.p8authentication key. For more information, see Generate a .p8 authentication key. - Key ID: Provide the Key ID associated with your
.p8authentication key. - Team ID: Provide your Apple Developer Team ID.
Note: Token-based authentication is set as the default for new adapters and does not require periodic renewal.
Certificate-based authentication
- PEM File: Upload the
.pemfile. Ensure the file is a valid UTF-8-compatible PEM text file. For more information on the.pemfile, see Generate a .pem file. - PEM File Password: Provide the password that protects the
.pemfile. If you generated a.pemfile from a.p12file that was created with a password, provide the password here.
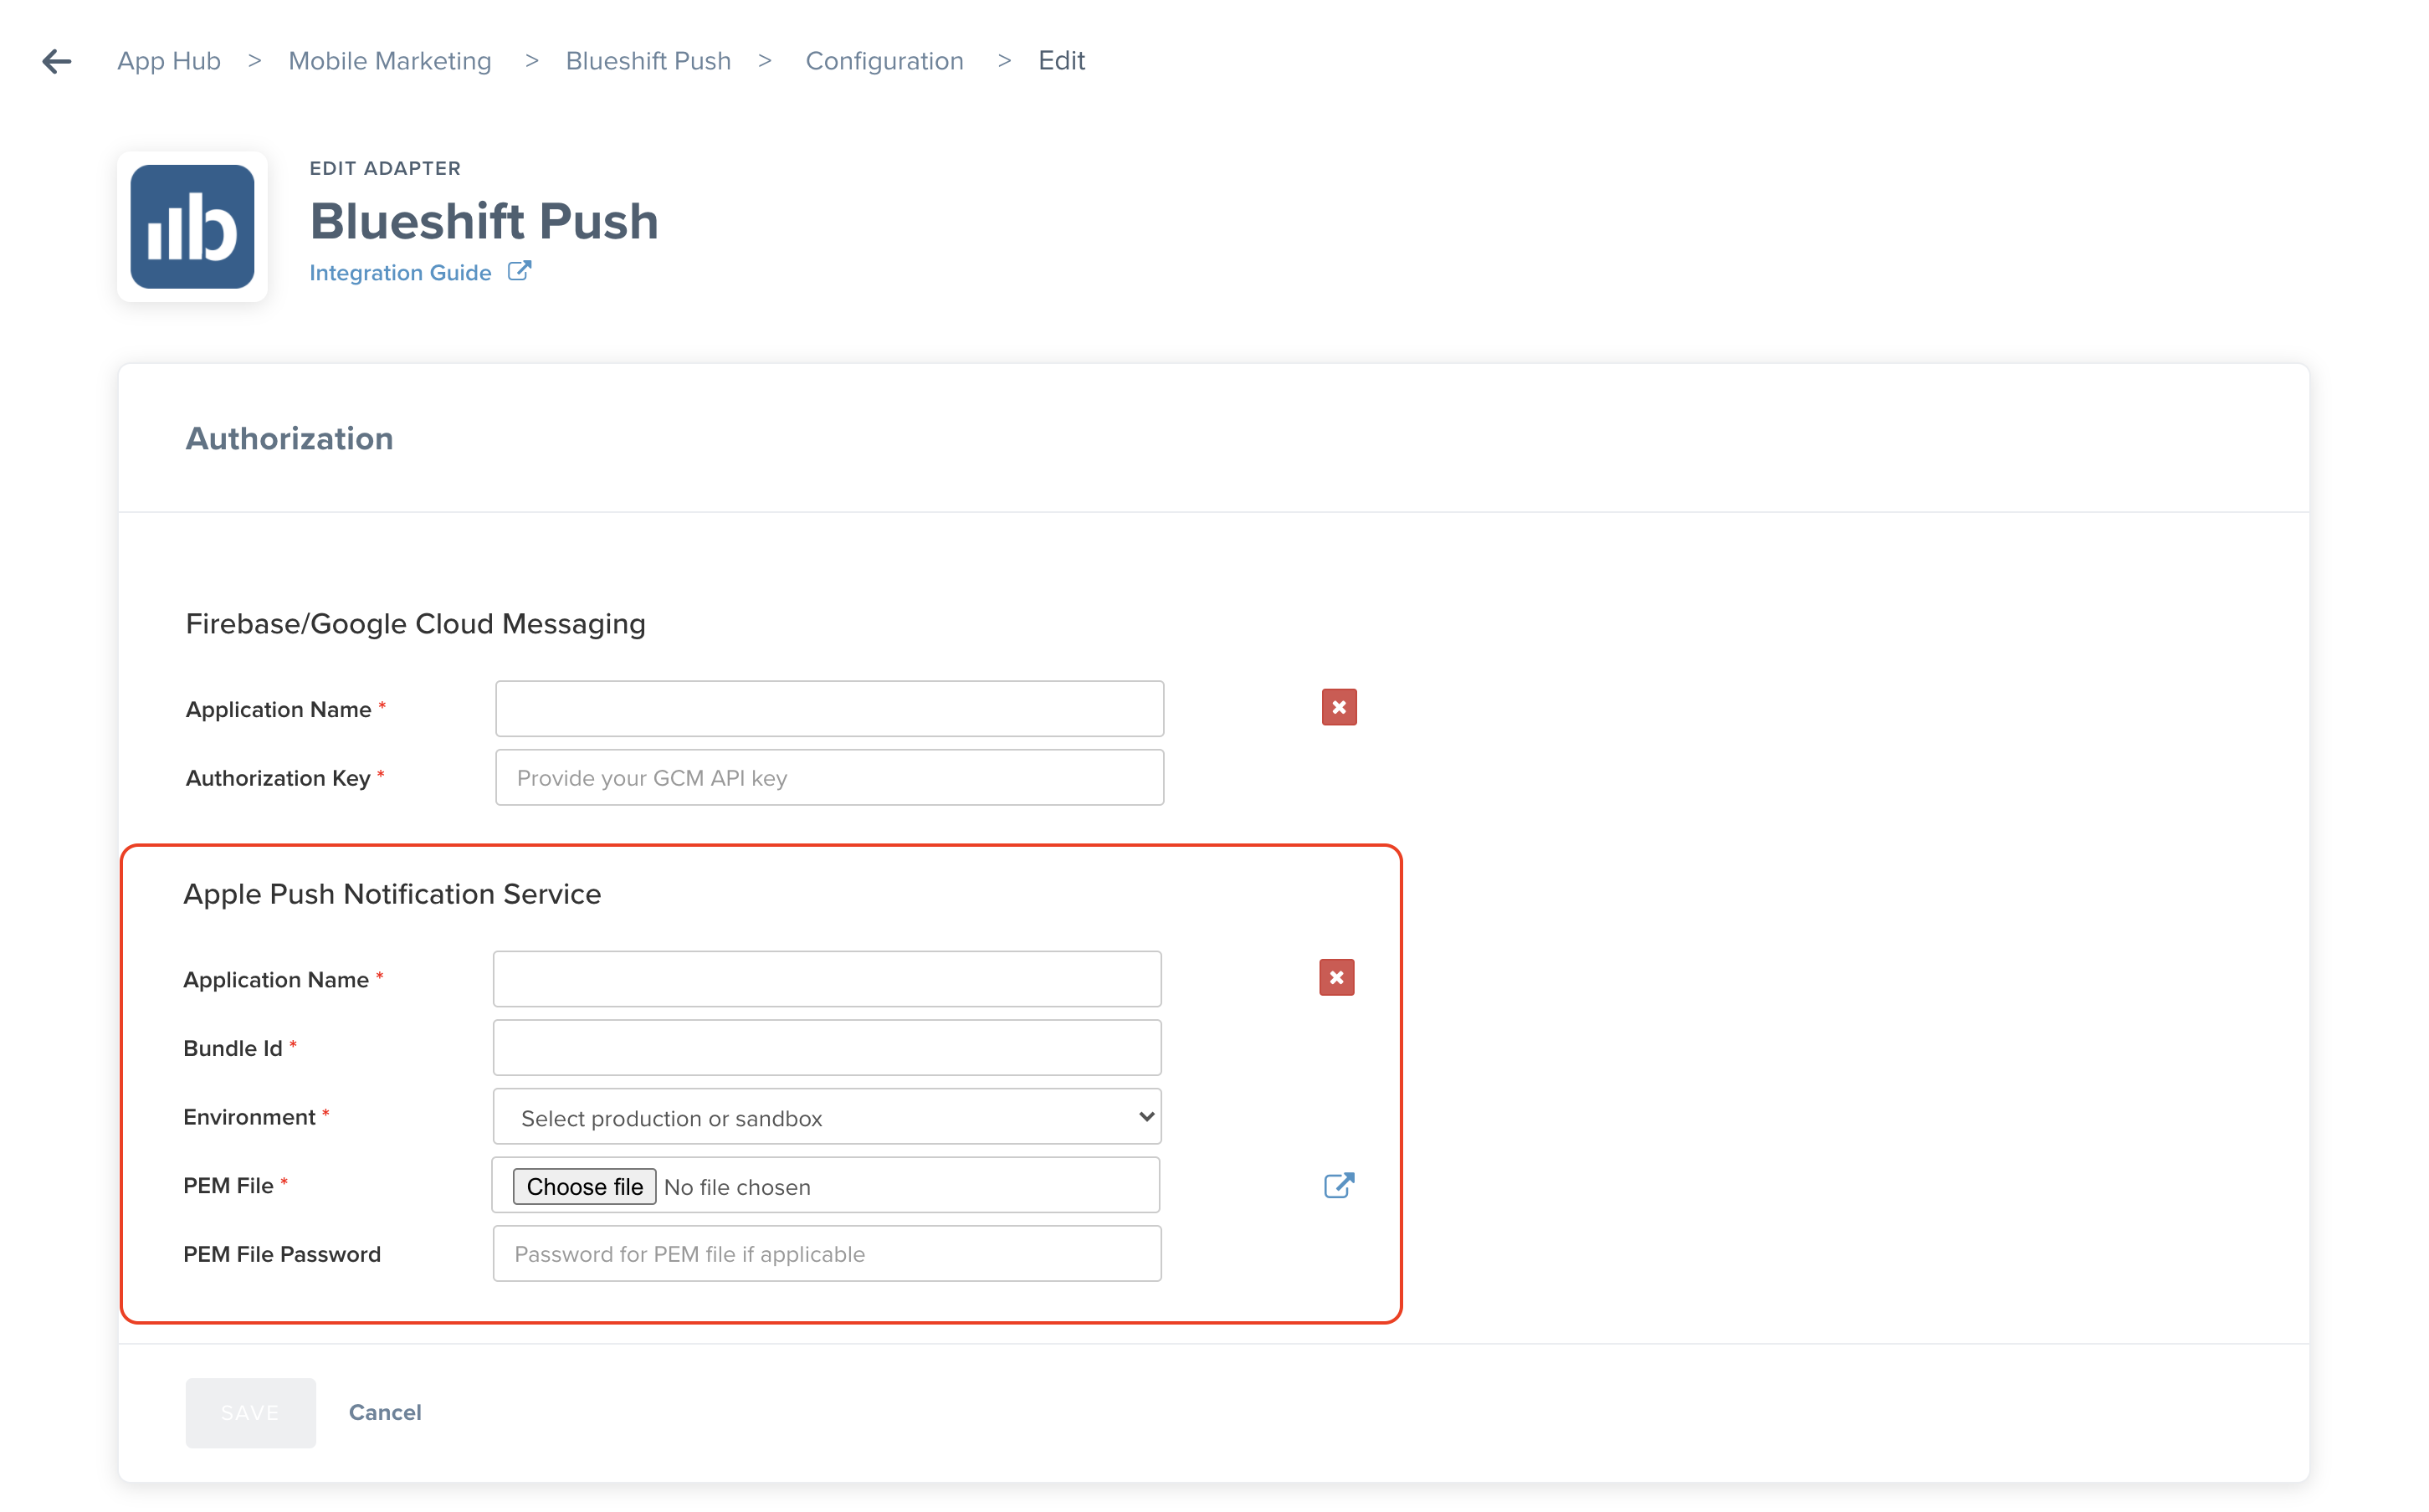
a. Once you have the information, click Edit Adapter to edit an existing adapter.
b. Click +ADD APNS APPLICATION, add the required information, and click Save.
c. You can set the adapter as the default adapter. The default adapter is used for test push sends/campaign sends if no adapter is selected.
Multi-app account
These are accounts that allow you to add multiple apps per platform. You can create multiple adapters to register multiple apps.
You will need the following information to register an iOS app.
- Application Name: Provide the name of the application that you have integrated with Blueshift. The name can be anything, but the Android and iOS app names need to be unique for that adapter.
- Bundle ID: Provide the application's bundle ID that uniquely identifies your app. For more information, see Bundle IDs. You can not create multiple adapters using the same bundle ID, but you can use the same bundle ID for the Android and iOS apps in the same adapter.
- Environment: Choose Production or Sandbox based on your application build type. To know more about the Environment selection, refer to this section.
- Select Authentication Method: Choose Token-based authentication (recommended) or Certificate-based authentication.
Token-based authentication
- APNS Token: Upload the
.p8authentication key. For more information, see Generate a .p8 authentication key. - Key ID: Provide the Key ID associated with your
.p8authentication key. - Team ID: Provide your Apple Developer Team ID.
Note: Token-based authentication is set as the default for new adapters and does not require periodic renewal.
Certificate-based authentication
- PEM File: Upload the
.pemfile. Ensure the file is a valid UTF-8-compatible PEM text file. For more information on the.pemfile, see Generate a .pem file. - PEM File Password: Provide the password that protects the
.pemfile. If you generated a.pemfile from a.p12file that was created with a password, provide the password here.
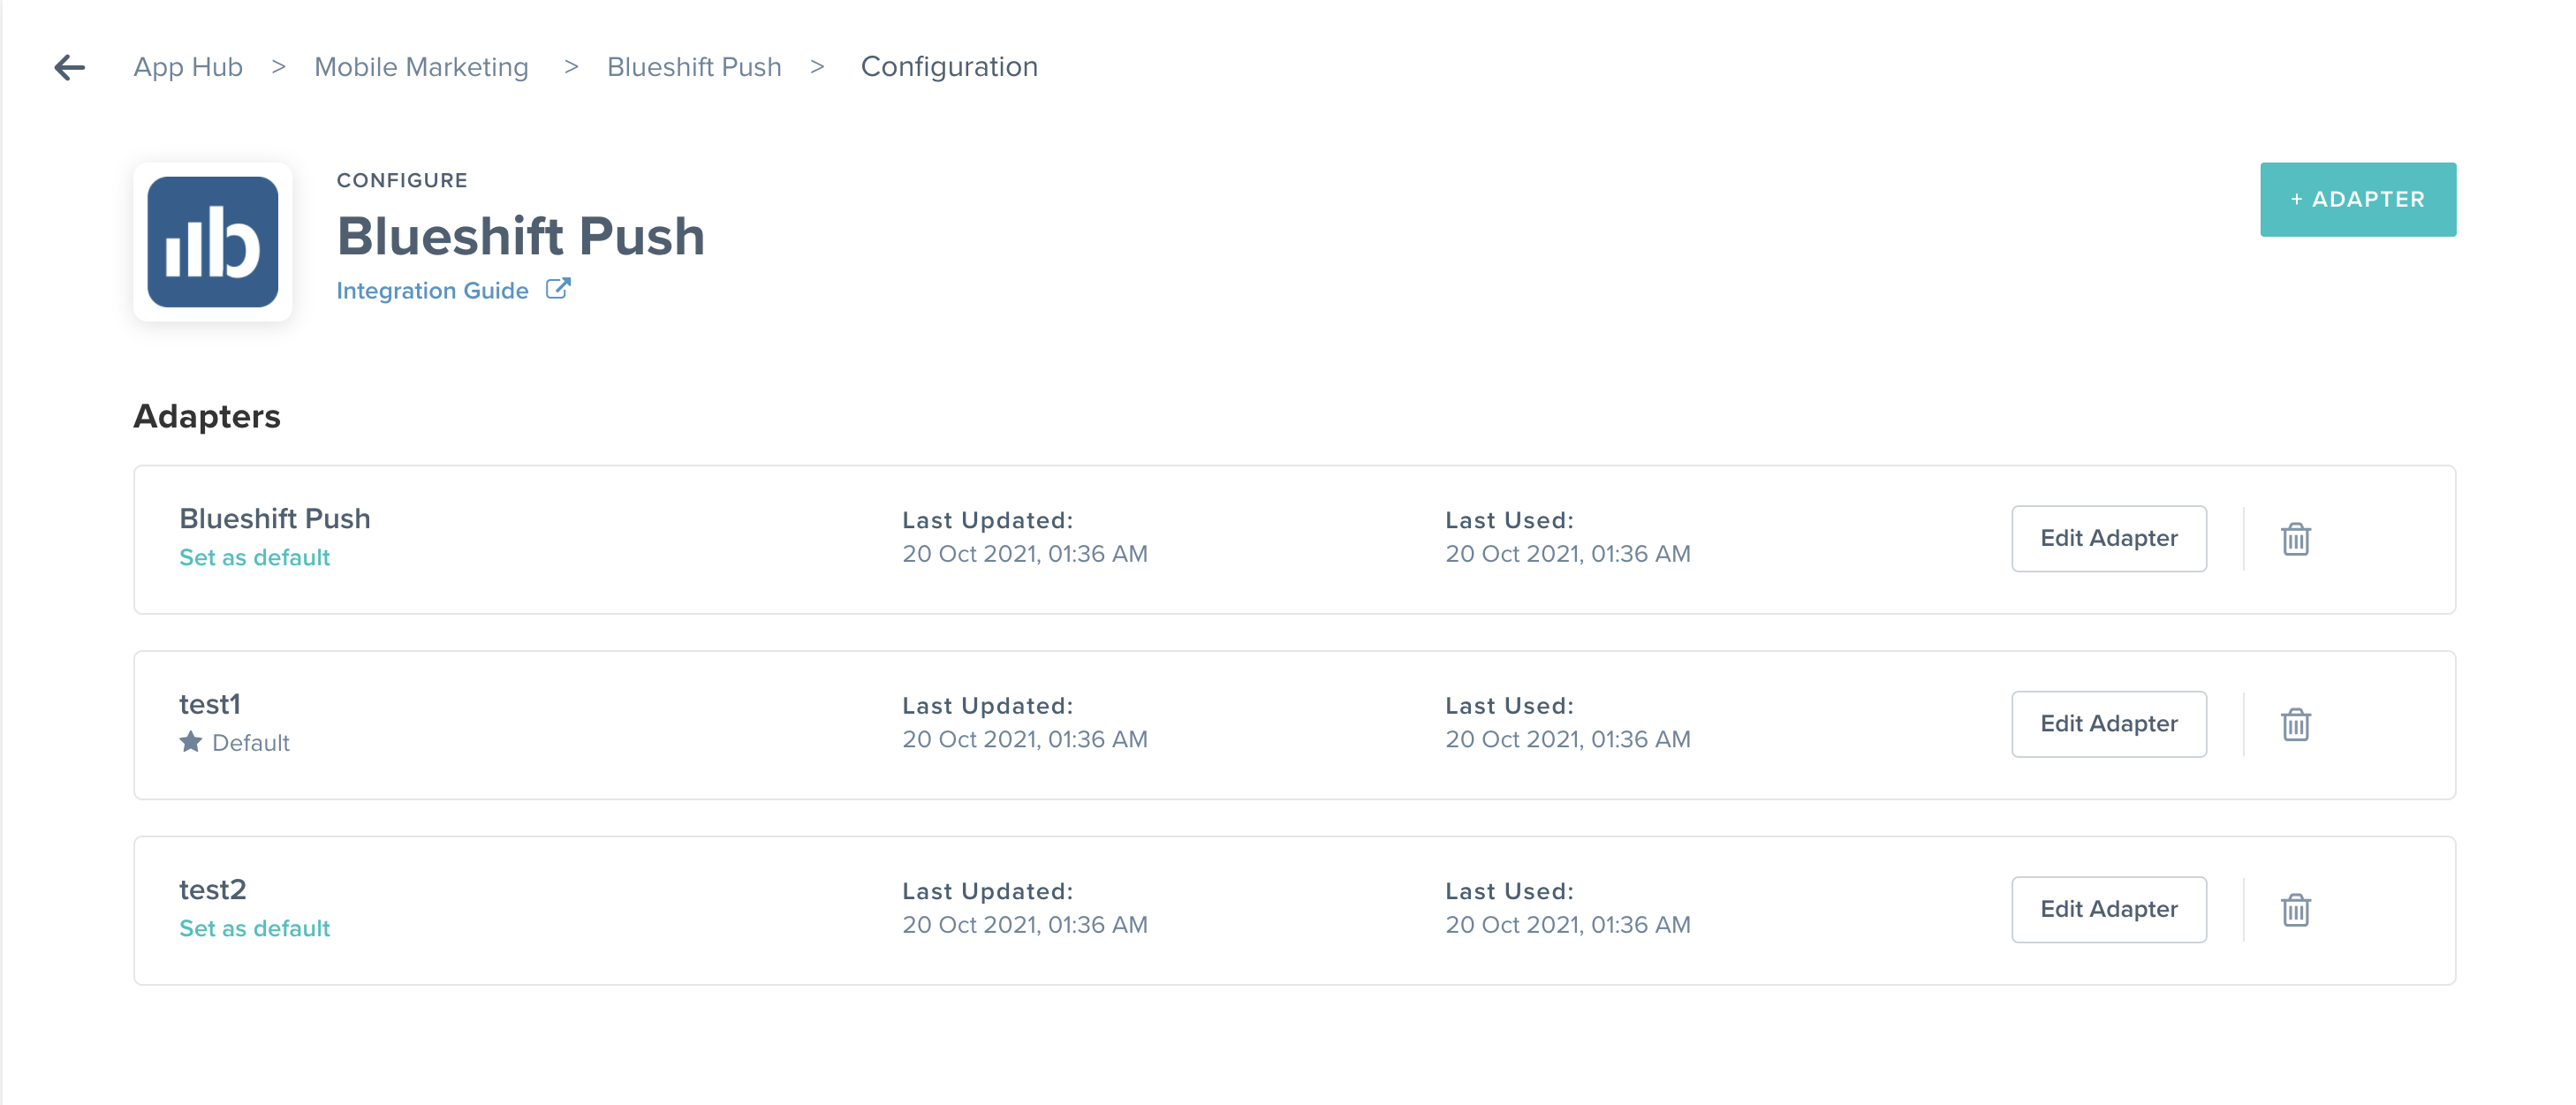
a. Click +ADAPTER to add a new adapter or click Edit Adapter to edit an existing adapter.
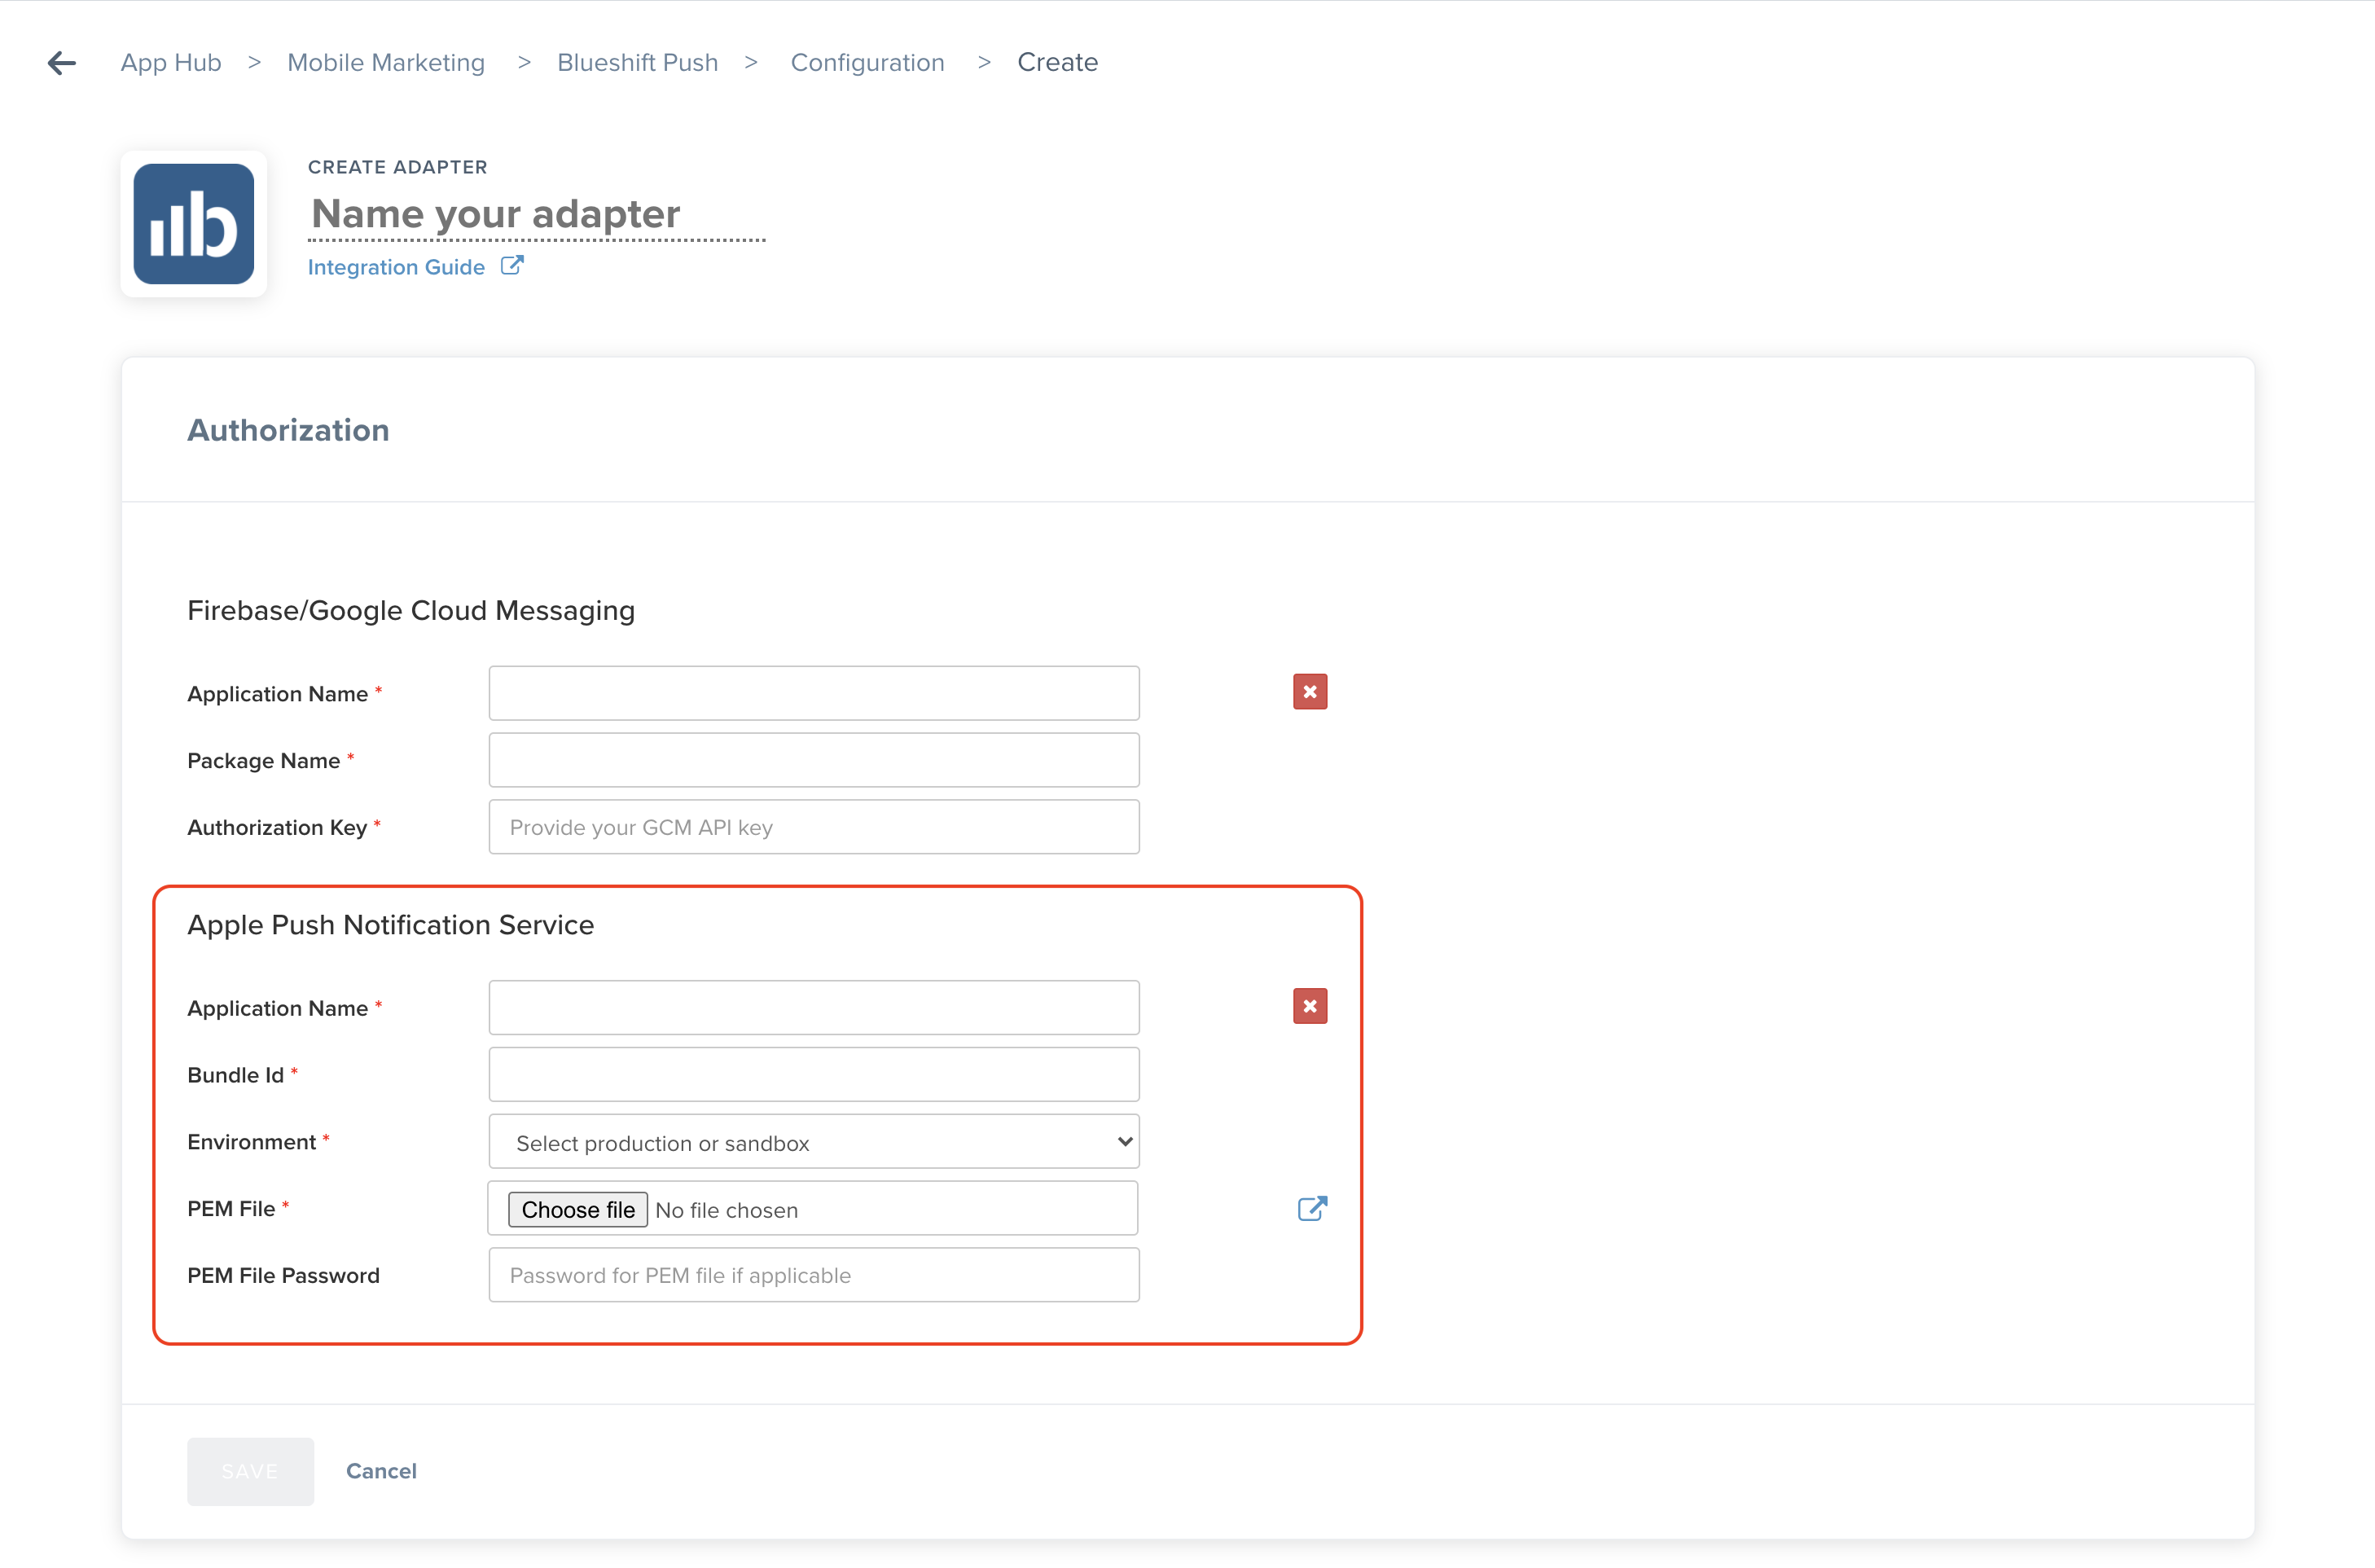
b. Add a Name for the new adapter.
c. Click + ADD APNS APPLICATION, add the required information, and click Save.
d. You can set the adapter as the default adapter. The default adapter is used for test push sends/campaign sends if no adapter is selected.
If you have an Android version of this app and you want to register it with us so that you can send notifications to your Android app's users using our platform, complete the steps described in Register your Android app with Blueshift.
If you have multiple applications that you want to register, use the breadcrumbs to go back to the Blueshift Push adapters index.
Environment selection for push adapter
Blueshift can have only one APNS configuration per push adapter. You can either set it up for the Sandbox or Production environment based on the application build type.
The Development build requires the Sandbox environment to be set for the push adapter, while Test Flight/Ad Hoc/Distribution/App Store builds require the Production environment to be set for the push adapter.
How this value is used depends on your authentication method.
Token-based authentication
The .p8 key works against both APNS endpoints, so the gateway is selected per device. The SDK detects each device's APNS environment and sends it to Blueshift, and Blueshift routes to the matching endpoint:
- A sandbox device token goes to
api.sandbox.push.apple.com. - A production device token goes to
api.push.apple.com.
This means a single adapter can serve both sandbox and production devices. The environment set on the adapter is used only as a fallback when a device has no APNS environment recorded.
Certificate-based authentication
The .pem certificate is bound to one environment, so the device's APNS environment must match the environment set on the adapter. If it does not, the send fails with an environment mismatch rather than being routed to the other gateway.
If you have set the Production environment for an adapter and want to switch it to Sandbox, you can delete the existing APNS configuration and add it again with the Sandbox environment and the supported PEM file.
Updated 24 days ago