Push notifications (Android)
Learn how to set up and customize push notifications in your app.
This guide explains how to enable push notifications and customize their behavior in your Android app.
Prerequisites
Before setting up push notifications, ensure you have completed:
- Set up Blueshift Android SDK - includes:
- Firebase Cloud Messaging (FCM) installation
- Code changes for FCM integration (first-time or existing)
- Register your Android app with Blueshift - includes:
- Push adapter configuration
Set up push notifications
Request notification permission (Android 13+)
For apps targeting Android 13 (API level 33) and above, request notification permission.
Add this to your MainActivity:
MainActivity:// Add inside onCreate() method, before setContent or setContentView
Blueshift.requestPushNotificationPermission(this)
// Add inside onCreate() method, before setContentView
Blueshift.requestPushNotificationPermission(this);
Handle deep links
Configure your app to navigate to the correct screen when a push notification is tapped.
Add this to the Activity's onCreate() method:
import com.blueshift.rich_push.RichPushConstants

val deepLinkURL = intent.getStringExtra(RichPushConstants.EXTRA_DEEP_LINK_URL)
if (deepLinkURL != null) {
    // Handle the deep link - navigate to appropriate screen
}
import com.blueshift.rich_push.RichPushConstants;

String deepLinkURL = getIntent().getStringExtra(RichPushConstants.EXTRA_DEEP_LINK_URL);
if (deepLinkURL != null) {
    // Handle the deep link - navigate to appropriate screen
}
Advanced
Register the default push service
If you are not using a custom push messaging service, register Blueshift’s default service in your AndroidManifest.xml to ensure push notifications are delivered correctly.
Add this inside your <application> tag:
<service
    android:name="com.blueshift.push.BlueshiftMessagingService"
    android:exported="false">
    <intent-filter>
        <action android:name="com.google.firebase.MESSAGING_EVENT" />
    </intent-filter>
</service>
Note:Add this only if you haven’t implemented a custom messaging service.
The Blueshift SDK uses this default service to handle FCM push notifications automatically.
Use existing Firebase Messaging Service
If your app already has a FirebaseMessagingService implementation, integrate Blueshift notifications without replacing your existing service.
Use Blueshift's helper methods to handle Blueshift push notifications within your existing Firebase messaging service:
class ExistingMessagingService : FirebaseMessagingService() {
    override fun onMessageReceived(remoteMessage: RemoteMessage) {
        if (BlueshiftUtils.isBlueshiftPushMessage(remoteMessage)) {
            BlueshiftMessagingService.handleMessageReceived(applicationContext, remoteMessage)
        } else {
            // The push message does not belong to Blueshift. Please handle it here.
        }
    }

    override fun onNewToken(newToken: String) {
        // for SDK version v4.0.0 and above
        BlueshiftMessagingService.handleNewToken(applicationContext, newToken)

        // for SDK version older than v4.0.0
        BlueshiftMessagingService.handleNewToken(newToken)

        // Use the new token in your app if needed.
    }
}
public class ExistingMessagingService extends FirebaseMessagingService {

    @Override
    public void onMessageReceived(RemoteMessage remoteMessage) {
        if (BlueshiftUtils.isBlueshiftPushMessage(remoteMessage)) {
            BlueshiftMessagingService.handleMessageReceived(getApplicationContext(), remoteMessage);
        } else {
            // The push message does not belong to Blueshift. Please handle it here.
        }
    }

    @Override
    public void onNewToken(String newToken) {
        // for SDK version v4.0.0 and above
        BlueshiftMessagingService.handleNewToken(getApplicationContext(), newToken);

        // for SDK version older than v4.0.0
        BlueshiftMessagingService.handleNewToken(newToken);

        // Use the new token in your app if needed.
    }
}
Note:This approach allows you to maintain your existing Firebase messaging service while seamlessly integrating Blueshift notification handling.
Override push notification clicks
Customize what happens when users tap notifications.
Step 1: Create custom activity class
import com.blueshift.BlueshiftNotificationEventsActivity
import android.os.Bundle

class CustomNotificationEventsActivity : BlueshiftNotificationEventsActivity() {
    override fun processAction(action: String?, extraBundle: Bundle?) {
        super.processAction(action, extraBundle)
        // Add your custom handling here
    }
}
import com.blueshift.BlueshiftNotificationEventsActivity;
import android.os.Bundle;

public class CustomNotificationEventsActivity extends BlueshiftNotificationEventsActivity {
    @Override
    protected void processAction(String action, Bundle extraBundle) {
        super.processAction(action, extraBundle);
        // Add your custom handling here
    }
}
Step 2: Register in AndroidManifest.xml
Add inside <application> tag:
<activity
    android:name=".CustomNotificationEventsActivity"
    android:exported="false">
    <intent-filter>
        <action android:name="com.blueshift.NOTIFICATION_CLICK_EVENT" />
    </intent-filter>
</activity>
Listen to push notification events
Track delivery and click events.
import com.blueshift.Blueshift
import com.blueshift.BlueshiftPushListener
import android.util.Log

Blueshift.setBlueshiftPushListener(object : BlueshiftPushListener {
    override fun onPushDelivered(data: Map<String, Any>) {
        Log.d("PushEvent", "Push delivered")
    }

    override fun onPushClicked(data: Map<String, Any>) {
        Log.d("PushEvent", "Push clicked")
    }
})
import com.blueshift.Blueshift;
import com.blueshift.BlueshiftPushListener;
import android.util.Log;

Blueshift.setBlueshiftPushListener(new BlueshiftPushListener() {
    @Override
    public void onPushDelivered(Map<String, Object> data) {
        Log.d("PushEvent", "Push delivered");
    }

    @Override
    public void onPushClicked(Map<String, Object> data) {
        Log.d("PushEvent", "Push clicked");
    }
});
Schedule push notifications
Control when notifications appear by adding timestamps to the push payload:
{
  "timestamp_to_display": 1508142900,
  "timestamp_to_expire_display": 1510820700
}timestamp_to_display: When the notification should be displayedtimestamp_to_expire_display: When the notification should no longer be displayed
Test push notifications
Get device ID
In MainActivity, add this code inside the onCreate() method, before setContent or setContentView:
import android.util.Log
import com.blueshift.util.DeviceUtils

val deviceId = DeviceUtils.getDeviceId(this)
Log.d("PushTest", "Device ID: $deviceId")
import android.util.Log;
import com.blueshift.util.DeviceUtils;

String deviceId = DeviceUtils.getDeviceId(this);
Log.d("PushTest", "Device ID: " + deviceId);
Run your app and search for PushTest in Logcat. You'll see something like the following:
D/PushTest: Device ID: eEzgZKd6QE-M0P5oHL-mWS:com.example.blueshiftsdktestCopy the Device ID.
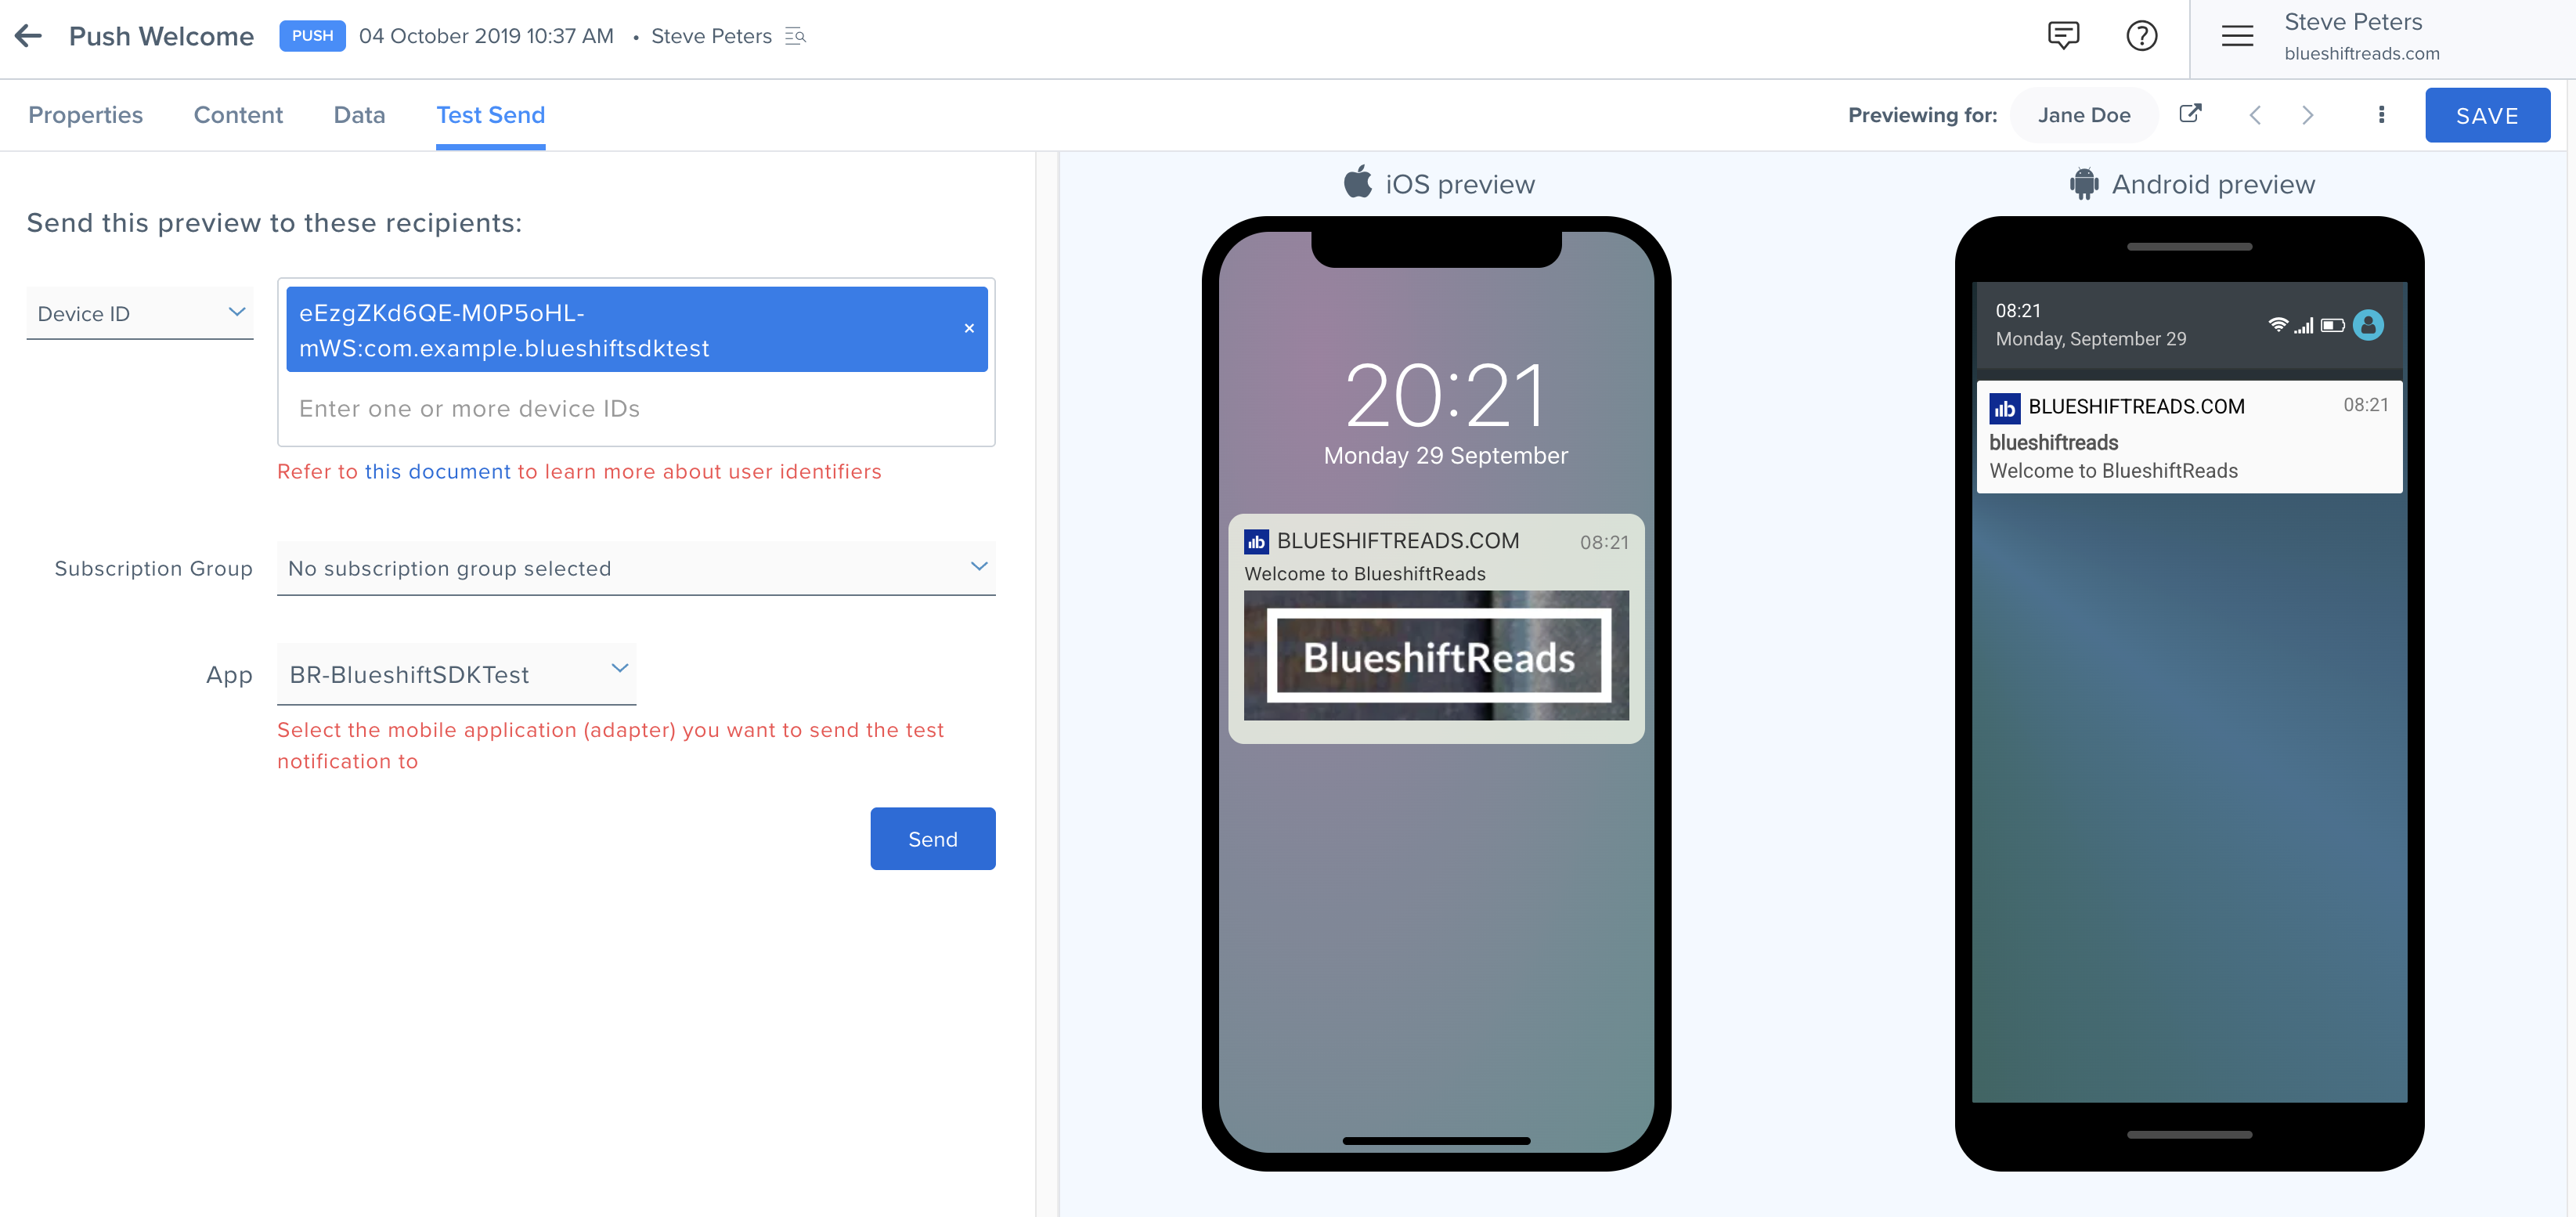
Send test notification from Blueshift
- Go to Push Studio in the Blueshift dashboard
- Create a new push notification or open an existing one
- Click the Test Send tab
- Enter the Device ID in the Device ID field
- Select the adapter from the App dropdown
- Click Send
Verify notification receipt
Check your device/emulator:
- The notification should appear in the notification tray
- Swipe down to see it
If the notification doesn't appear:
- Check notification permission is granted
- Verify Firebase setup is complete
- Check that the push adapter is configured in the Blueshift dashboard
- Review Logcat for any error messages containing
BlueshiftorFCM
Verify with push listener
If you have added a push listener, you can search Logcat for PushEvent, and you should be able to find similar logs.
D/PushEvent: Push delivered
D/PushEvent: Push clicked
Test deep links
Step 1: Add deep link to notification
In Push Studio, add a deep link URL to your notification (example: https://yourapp.com/product/123)
Step 2: Send test notification
Use the Test Send tab to send the notification to your device
Step 3: Tap the notification
When the notification appears, tap it to open your app
Step 4: Check Logcat
Search for PushTest in Logcat. You should see:
D/PushTest: Deep link: https://yourapp.com/product/123If you see the deep link in the logs, your deep link handling is working correctly. The URL is now available in the app, enabling users to navigate directly to the relevant screen.
Reference documentation
For more information about push messaging:
Updated 7 months ago